Boot config (config.txt)#
/boot/firmware/config.txt declares the camera sensor and switches on the hardware buses and the RP1 overclock. Edit it from the settings editor's config.txt tab (boot & sensors):
http://cinepi.local:5000/settings-editor/
The tab edits only the block CineMate owns, fenced by two marker lines:
# >>> cinemate-install >>>
...
# <<< cinemate-install <<<
A save rewrites the camera section (between # ---- Camera section ---- and
# ---- End camera section ----) and the dtparam=i2c_arm=on / dtparam=i2s=on / dtparam=spi=on / dtparam=audio=on / dtoverlay=rp1-overclock lines. Every other line, in the fence or outside it, is untouched. The camera section is replaced wholesale: the installer's five commented example blocks, one per sensor, collapse on the first save to camera_auto_detect= plus your overlay lines.
Hand edits outside the fence survive this page and cinemate-update.sh, which never touches config.txt. They do not survive a re-run of cinemate-install.sh: configure_boot_config() rewrites the whole file as the managed block alone, copying the old one to the installer's backup directory.
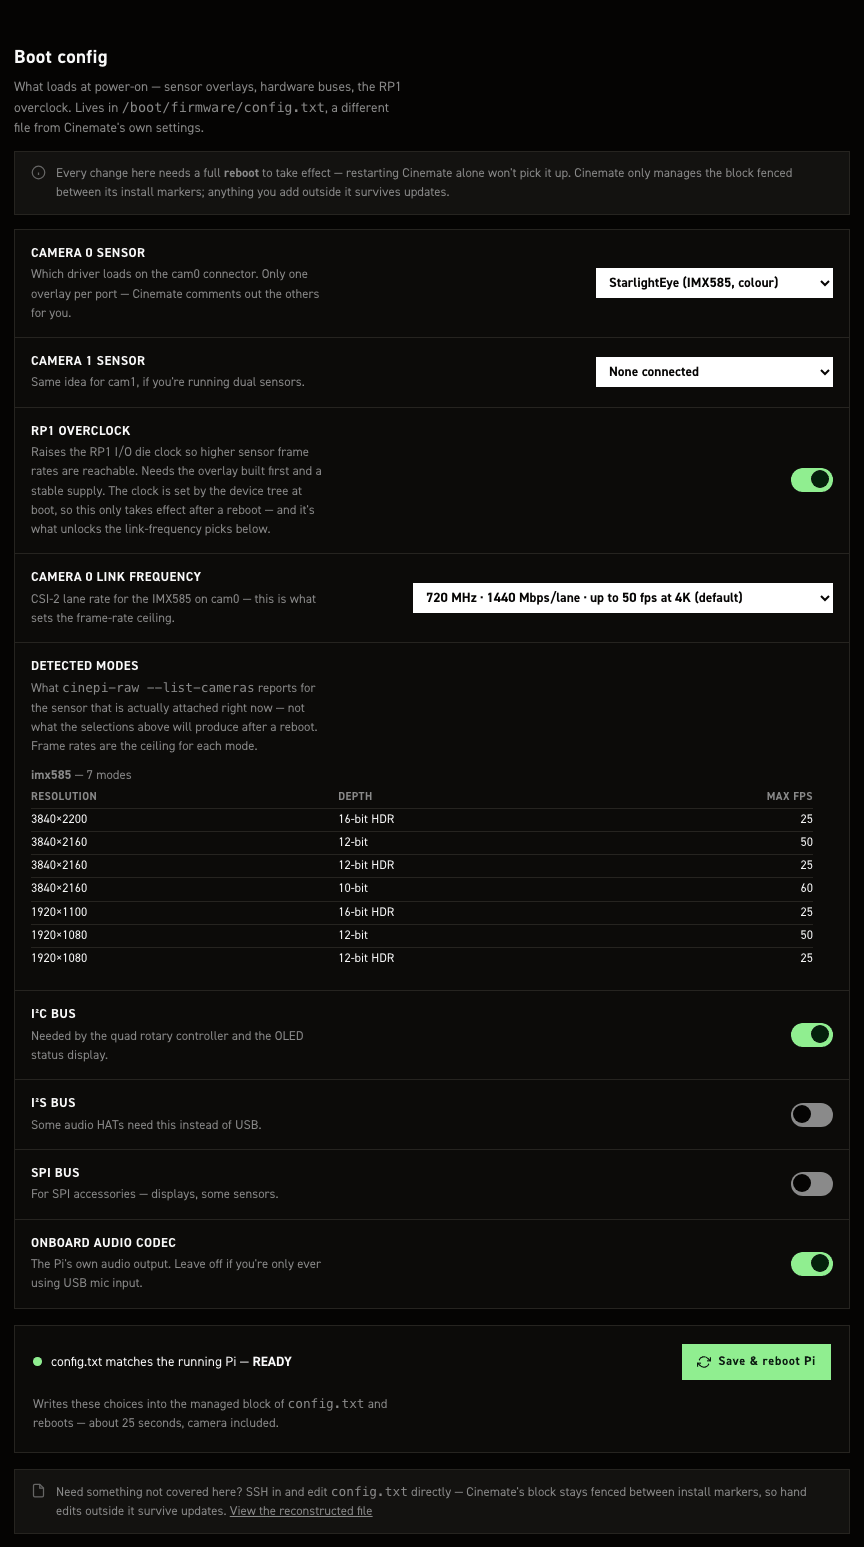
Link frequency for RP1 overclock#
Entries read as MHz, Mbps per lane, then the published 4K frame rate where sensors.json records one, today IMX585 only: 720 MHz · 1440 Mbps/lane · up to 50 fps at 4K (default). IMX283's two entries stop at the Mbps figure. Entries the RP1 is not specified for are suffixed — over RP1 spec.
Switch to a different sensor#
- Connect the sensor to cam0 or cam1 with the Pi powered off.
- Power up and browse to
http://cinepi.local:5000/settings-editor. - Click the config.txt tab.
- Pick your sensor in Camera 0 sensor.
- Pick a second sensor in Camera 1 sensor, or leave it on None connected.
- Click the config.txt button in the top bar to read the reconstructed file.
- Read the danger note below.
- Click Save changes. The Pi writes
config.txtand reboots. - Wait about 25 seconds for the Pi to come back, camera included.
- Reload and check Detected modes lists the sensor you fitted.
Hand edits#
In the Raspberry Pi terminal:
editboot
opens /boot/firmware/config.txt in nano
sudo nano /boot/firmware/config.txt
Uncomment the block for your sensor, comment out the others, then run sudo reboot. The
clean-install default is imx477 on cam0. Nothing validates what you type and nothing reboots for
you.
For a dual-sensor setup, attach both sensors and give each port its own overlay line:
dtoverlay=imx296,cam0
dtoverlay=imx296,mono,cam1
Example of the stock config.txt created by the installer script#
# >>> cinemate-install >>>
# Managed by cinemate-install.sh
# For more options and information see
# http://rptl.io/configtxt
# Some settings may impact device functionality. See link above for details

# Uncomment some or all of these to enable the optional hardware interfaces
dtparam=i2c_arm=on
#dtparam=i2s=on
#dtparam=spi=on

# Enable audio (loads snd_bcm2835)
dtparam=audio=on

# ---- Camera section ----

# Raspberry Pi HQ camera (IMX477, clean-install default on cam0)
camera_auto_detect=1
dtoverlay=imx477,cam0

# Raspberry Pi GS camera (IMX296, 10-bit RAW)
#camera_auto_detect=1
#dtoverlay=imx296,cam0

# OneInchEye (IMX283)
#camera_auto_detect=0
#dtoverlay=imx283,cam0

# StarlightEye color (IMX585)
#camera_auto_detect=0
#dtoverlay=imx585,cam0

# StarlightEye Mono (IMX585 mono)
#camera_auto_detect=0
#dtoverlay=imx585,cam1,mono

# ---- End camera section ----

# Automatically load overlays for detected DSI displays
display_auto_detect=1

# Automatically load initramfs files, if found
auto_initramfs=1

# Enable DRM VC4 V3D driver
dtoverlay=vc4-kms-v3d
max_framebuffers=2

# Don't have the firmware create an initial video= setting in cmdline.txt.
# Use the kernel's default instead.
disable_fw_kms_setup=1

# Run in 64-bit mode
arm_64bit=1

# Disable compensation for displays with overscan
disable_overscan=1

# Run as fast as firmware / board allows
arm_boost=1

# ---- RP1 overclock (Pi 5, optional) ----
# Raises imx585 ClearHDR frame rates. Uncomment and reboot to enable;
# re-comment and reboot to return to stock. See docs/overclocking.md.
#dtoverlay=rp1-overclock

[cm4]
# Enable host mode on the 2711 built-in XHCI USB controller.
# This line should be removed if the legacy DWC2 controller is required
# (e.g. for USB device mode) or if USB support is not required.
otg_mode=1

[cm5]
dtoverlay=dwc2,dr_mode=host

# CFE Hat PCIe 3.0
dtparam=pciex1
dtparam=pciex1_gen=3

[all]
auto_initramfs=1
avoid_warnings=1
disable_splash=1
hdmi_ignore_cec_init=1
dtparam=i2c1=on
dtoverlay=disable-bt
# <<< cinemate-install <<<